Informative

Are Storm Windows Approved by Historic Preservation?

Living in a Historic Preservation Neighborhood often does not allow for window replacement or it is difficult and expensive to replace your windows.

As your curtains are blowing from the drafts, winters are cold and summers are hot in your home, you might be considering it though.

What if we told you there was another way… a cheaper alternative that decreased utility costs, made your home comfortable, and didn’t involve ripping our your very expensive windows that are a character defining feature of the home? The answer is simply, storm windows. Not window replacement. Window replacement costs thousands while storm windows cost hundreds.

So are they approved by HP?

  • YES! IF THE GUIDELINES ARE FOLLOWED, STORM WINDOWS ARE TYPICALLY AN ADMINISTRATIVELY APPROVED ITEM IN HISTORIC PRESERVATION NEIGHBORHOODS.

  • STORM WINDOWS ARE CONVENIENT, AFFORDABLE AND SUSTAINABLE ALTERNATIVE TO REPLACEMENT

  • BELOW ARE THE HISTORIC PRESERVATION GUIDELINES FOR THE CITY OF OKLAHOMA CITY, CITY OF NORMAN, AND TULSA

Let’s take a look at Oklahoma City, Norman, and Tulsa

Oklahoma City

  • “Adding storm windows over historic wood or metal windows is a cost-effective approach that preserves the original window and provides energy savings equal to new replacement windows.”

  • Approval: Administrative Review

  • 3.6.23: Storm window frames must have narrow perimeter framing that conforms to the primary window opening

  • 3.6.24 Do not use unfinished or clear anodized aluminum frame storm windows

  • 3.6.25 Storm windows my have an integral screen component

  • 3.6.26 Interior storm windows are encouraged

  • City of Oklahoma Contact Page

  • Historic Preservation Guidelines

  • Historic Preservation Application

  • Neighborhoods: Heritage Hills, Heritage Hills East, Mesta Park, Jefferson Park, Paseo, Edgemere Park, Crown Heights, Putnam Heights, Shepherd

Norman

  • “Increase the thermal efficiency of historic buildings by observing appropriate traditional practices, such as weather stripping and caulking, and by introducing energy-efficient features such as awnings, operable shutters, and storm windows and doors, where appropriate”

  • Approval: Administrative Bypass

  • The use of interior storm windows is encouraged

  • 3.11.2a: Wood framed, full-light storms that are low profile and align with meeting rails of window

  • 3.11.2b: Relatively unobtrusive, narrow-profile, metal exterior storm windows that do not obscure the window itself… and that are finished in a painted or baked-enamel color compatible with the sash color are allowed. Storm window rails are to align with the meeting rails of the windows.

  • 3.17.1.a Unfinished or clear anodized aluminum storm finishes are not permitted

  • City of Norman Contact Page

  • Historic Preservation Guidelines

  • Historic Preservation Application

  • Neighborhoods: Miller Historic District, Chautauqua Historic District, Southridge Historic District

Tulsa

  • “Did you know that properly repaired historic windows have an R-value that’s nearly indistinguishable from high-end replacement windows? Repair your original windows, install proper weatherstripping, and add a good storm window system…”

  • Approval: Staff Approved

  • A.4.4 to gain thermal efficiency, storm windows which maintain the appearance and allow maximum visibility of the original historic windows may be installed. Unfinished and clear-finished metals are not allowed

  • Tulsa Preservation Commission Contact Page

  • Historic Preservation Guidelines

  • Historic Preservation Application

  • Neighborhoods: Maple Ridge, Brady Heights, Buena Vista Park, Carlton Place, Gillette, Owen Park, Riverside, Riverview, Yorktown, Swan Lake, Tracy Park, White City and Stonebraker Heights.

OLD HOME RESCUE IS PROUD TO OFFER OUR SERVICES IN OKLAHOMA & MORE!

OLD HOME RESCUE IS OKLAHOMA’S #1 STORM WINDOW AND DOOR INSTALLER!

WE FOCUS ON CREATING ENERGY EFFICIENT HOMES WITHOUT WINDOW & DOOR REPLACEMENT.

We have saved windows & doors from being replaced in Kansas, Oklahoma, Texas, and Missouri, were listed by The Craftsman Blog as “Preservation Rockstars”, and have been featured on HGTV’s Restore and Revive. 

Old Home Rescue is now proud to offer our energy efficient window and door solutions in Oklahoma City, The Village, Nichols Hills, Norman, Edmond, El Reno, Yukon, Moore, Mustang, Tulsa, Enid, Ponca City, Lawton, Ardmore, Bartlesville, Warr Acres, Bethany, and more!

We serve all of Oklahoma City, including nationally listed historic districts like; Heritage Hills, Mesta Park, Crown Heights, Jefferson Park, Paseo, Shepherd and more.

We serve all of Tulsa, including nationally listed historic districts like; Maple Ridge, Brady Heights, Buena Vista Park, Carlton Place, Gillette, Owen Park, Riverside, Riverview, Yorktown, Swan Lake, Tracy Park, White City and Stonebraker Heights.

We work closely with Oklahoma SHPO and Local Preservation Commissions to make sure all products and services are approved and receive a certificate of appropriateness. 

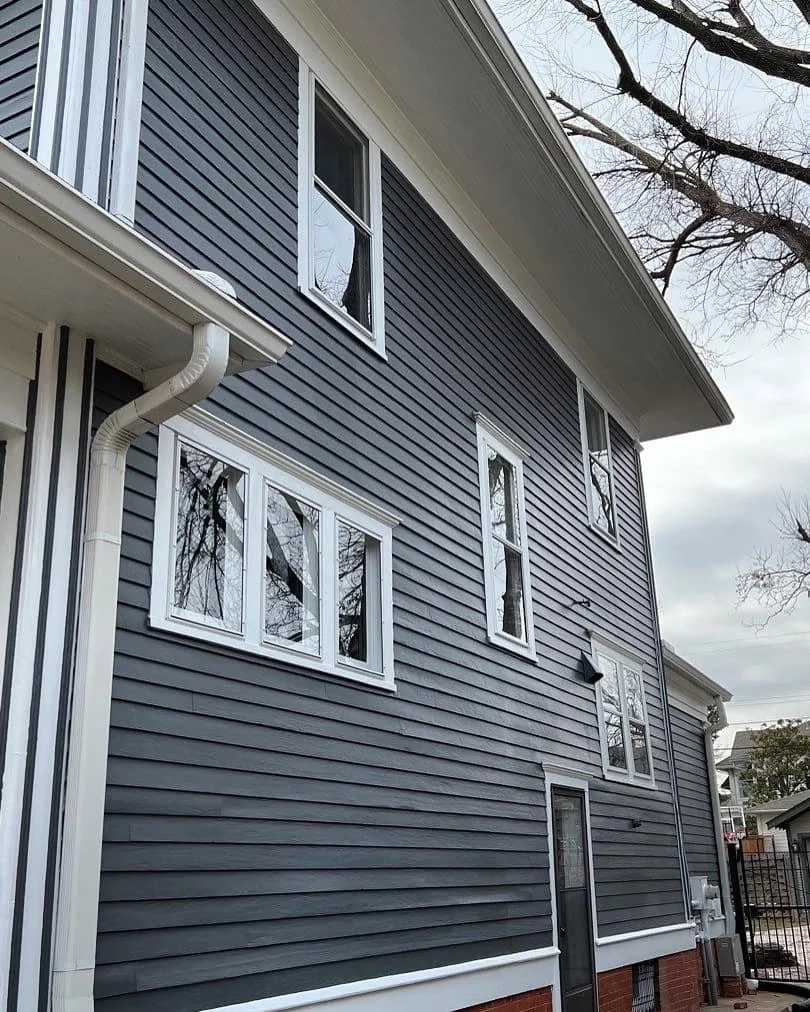
Unlike most window replacement companies, we specialize in NOT replacing your windows! Old Home Rescue’s products and services are designed to extend the life of your current windows.

Our window solutions use the best products available, like MonRay aluminum storm windows and doors, QUANTAPANEL aluminum storm windows, Pella aluminum storm doors, Provia aluminum storm doors, Indow Window acrylic interior storm windows, InnerGlass interior air panels, Allied aluminum storm windows, and traditional wood storm windows and doors.

Our goal is to improve the energy efficiency of any space without the need for low quality, high cost, double pane replacement windows, and our services and products are very affordable when compared to the lifetime cost of window replacement.

We encourage you to become our NEIGHBOR by scheduling an appointment.

What to do After Hail or Storm Damage on an Old Home

Hail and storm damage is stressful for any homeowner; however, when you’re in an old home or a historically preserved neighborhood, this can be even more stressful as you’ll need to ensure repairs are handled properly, stay within historic preservation guidelines, and work with insurance companies to cover the true cost of restoration work. We know this, not only because we work with old homes, but we live in old homes too.

Hail damage to a historic home in Norman, OK in April 2021

Hail damage to a historic home in Norman, OK in April 2021

Here’s what you need to know if your old home has hail or storm damage:

  1. Document your entire home and property with pictures and videos

    • Hail covering the ground or any surface and its size

    • Take pictures of the damage from far away and up close

    • Take pictures of all parts or elevations of your home, even if you don’t see damages. A good contractor or your insurance may be able to find additional damage that you don’t notice.

  2. Secure your home first

    • From leaking roofs to broken windows, the most important thing is to stop additional water from getting inside your home.

    • When boarding up windows, ensure that you or the company completing the work do not inflict further damage to the windows securing your home. This can happen by screwing OSB through the aluminum cladding of windows, compromising the window integrity.

    • Leaking roofs should have a quick fix completed until the roof can be assessed and repaired or replaced properly by a roofing contractor who understands old homes and their different roofing rules.

  3. If there is no emergency at your home, contact a contractor who understands old homes to inspect the damage.

    • Find a contractor who understands old homes, old home construction, and historic preservation guidelines.

    • Not all contractors are the same. This is through no malice or fault of many contractors. New construction and old construction are not one and the same. The typical contractor understands new construction well; however, if those rules are applied to old homes, it can cause premature failure of roofing, siding, painting, and window products.

    • Following large storms, everyone becomes a roofer and many of these scammers will lie to you about their experience or promise things that are illegal.

  4. Contact your insurance company to file a claim

    • With your pictures plus the contractor’s conditions report, you’ll have a much smoother process with your insurance claim process to put your home back together right.

    • After you’ve submitted your claim, an adjuster will likely be sent to your home to assess the financial damage. At this point, you can have your contractor on-site with the adjuster to talk about the damage.

Tips for Old Home Repairs after Hail or Wind Damage

  • Broken glass on single pane wood window

  • Glass can be easily repaired with the right products

  • Wavy glass is often scare but can be salvaged in small quantities

  • Reproduction wavy glass is not carried by most box stores or glass shops; however, Old Home Rescue works with suppliers to source replica glass

  • Replacement flat (not wavy) glass should be 1/8” double strength glass. Often box stores carry 3/32” single strength glass, which is fragile.

  • Use a quality glazing putty product.

  • Consider adding a storm window for future protection

  • Storm windows can come in wood or aluminum

  • Your double-hung wood window can cost $1500-$4000 for high-quality replica windows; however, they can be protected with quality storm window that ranges from $400-$1000

  • Not only will you have the protection of your primary wood sash window, but storm windows will create a more energy-efficient window as well as lengthen the maintenance cycle of your double-hung windows.

  • Consider upgrading your roof to an impact-resistant shingle

  • If you’re having your roof replaced, it may be a good time to upgrade to an impact-resistant shingle. If your home doesn’t have this type of shingle already, it may be an out-of-pocket expense for the upgrade; however, it could pay for itself by eliminating the need for a roof replacement by the next storm.

  • Consider Removing the damaged aluminum or vinyl siding

  • If your non-historic siding has been damaged, you may be able to work with your insurance company to follow historic preservation guidelines, which are considered code, to remove the non-historic cladding that could be causing rot and damage, if the damage is on more than 50% of a side to the home.

  • Before you replace, make sure it’s being replaced correctly

  • In the hundreds of homes we’ve worked on at Old Home Rescue, most of our work has centered around repairing bad repairs from the previous decade. Often the original construction and materials on the home are still in great condition, it is the repairs that have been completed incorrectly that have failed that we’re called out to fix.

Field Guide: Hardware for Double Hung Sash Windows

Installation of New Sash Hardware, Double Hung  

Your vintage windows need to lock! But what is the right way to get them to lock? How do close the gap and how do solve the most common problems? In this field guide and the video below we walk you through how to install a traditional sash lock and lift on a vintage wood window - a simple way to improve the beauty of an old home.

84021051_2440221562959661_1349066158434680832_n.jpg

Tools & Materials:

  • Lock & Keep

  • Lift

  • Sash lock shims

  • Measuring Tape

  • Pencil

  • Drill

  • 3/32” twist bit

  • 1/8“ twist bits

  • Flathead screwdriver - ratching screwdrivers will save your forearms!

  • Painter’s tape

Hardware Notes:

  1. Lock & keep are most commonly centered or matched with existing.

  2. Lift should be symmetrical and centered within a pane, when possible.

  3. Lift placement should be measured from the profile edge, not the stool.

  4. Windows 34”+ wide should have two locks and lifts installed to assist in smooth operation and pulling the meeting rails together for decreased air infiltration. 

Procedure:

  1. Old hardware holes should be filled with epoxy if they’re intended to be reused.

  2. Mark twist bits for the screw length with painter’s tape

  3. Find the center for the lock by measuring from the start of the profile on each side, dividing the measurement in half, and marking with a pencil on the lower check rail

  4. Align the keep centered on the mark with the based flush with the upper meeting rail. Pre-drill with a ⅛” twist bit

  5. Install keep with provided screws using a flathead screwdriver

  6. Align the lock centered with the keep and the exterior, flat surface flush with the edge of the lower meeting rail. Test to see if the lock will pull the meeting tight. Pre-drill with ⅛” twist bit. 

  7. Install lock with provided screws and flathead screwdriver

  8. Find center for the lift by measuring on center in the glass opening and mark

    • Pro Tip: Raise the lower sash and mark center on the lower rail based on the lock placement.

  9. Mark the height to be ½” below the lower rail profile edge. 

    • Pro Tip: A scrap piece of parting bead is perfect for gauging 1/2'‘ below the profile.

  10. Align the lift on the marks, you may be able to clamp with a pistol grip clamp

  11. Pre-drill lift with 3/32” twist bit. You’ll notice that’s different than the lock pilot holes, as the screws are different sizes.

  12. Install lift with provided screws and flathead screwdriver

Acceptable: Pilot holes are drilled to the appropriate size. When fastened, the lock pulls the check rails together. Screws are not marred and are installed by hand. 

Unacceptable: Screws are marred, installed with drill, or head is sheared. The lock does not pull check rails together or secure the window. 

Field Guide: Double Hung Window Installation

This in-depth guide (to be completed later) will take you from setup and removal of your historic, double hung wood windows to their re-installation.

While this post focuses on the mechanical work of the window, you can check out our other field guides to finish your window;

Below is a quick reference checklist. Click the image for up-to-date changes.

Wood Window Lock
from $14.99
Finish/Pack Size:
Quantity:
Add To Cart

Field Guide: Keys to Long Lasting Wood Siding

Field Guide: Keys to Long Lasting Wood Siding

At Old Home Rescue, we do wood siding differently. We do this by incorporating today’s products, research and technology but in a way that maintains the character of an old home. This can most easily be demonstrated by taking James Hardie siding rules and applying them to a few quirks of old homes.

Field Guide: Exterior Window Painting

Below is the process that we have specifically developed with our local Sherwin Williams for our painters to restore old wood windows WITHOUT removing the sash from the window. Yes, it would be best practice to remove them; however, to do so is sometimes cost prohibitive. This is a method that will perform the needed maintenance on the windows, be eligible for Sherwin William’s lifetime warranty, and allows our Neighbors (we don’t have customers) to do much needed work on more windows.

If you do want to remove it to bare wood and deglaze, we highly recommend using a Speedheater over a heat gun and check out this video.

(For our process in Spanish click here)

Busik+Before.jpg
IMG-7293.jpg

The following process is for our on-site, exterior window restorations and part of our Lifetime Exterior Renovation. This is the difference between putting color on a window and prepping & painting a window that we can all stand behind the quality of work. 

  1. Any products outside of those specified and provided must be approved by Old Home Rescue prior to use. 

  2. Follow Manufacturer’s Specifications on all products

  3. Clean the Surface

    1. Pressure washers are NOT used to prep for paint application

    2. Remove all surface contamination by using the following; 

      1. Walls should be wet down with garden hose & nozzle

      2. Mix 1 gallon water, 1 cup bleach, & 1 cup TSP-PF

      3. Working in sections, clean from bottom to top to avoid streaks

      4. Rinse walls with garden hose and nozzle before solution dries

      5. Allow to dry until wood as 15% or less moisture level

  4. Prep the Surface

    1. Cover the work area with plastic or drop clothes to collect paint debris

    2. Existing loose, peeled or checked paint must be scraped with a pull scraper to a sound layer. 

    3. Feather sand any rough edges from peeling paint with a sanding pad to improve the final appearance and adhesion.

    4. Removal of old paint runs

    5. Set nail heads on wood where exposed beyond surface level

    6. Remove all unused fasteners & hardware

    7. Repair rot with up to a golf ball sized quantity of Abatron WoodEpox BEFORE priming or a primed replacement board. Damage or rot exceeding epoxy threshold should be communicated to Old Home Rescue

    8. Repair minor cracks with Aqua Glaze or exterior painter’s putty AFTER spot priming.

    9. Caulking should be completed AFTER priming

  5. Glazing Repair

    1. Replace any broken glass with 1/8” double strength flat glass or reproduction wavy glass, as specified. Pin glass in place using glazing points with at least 2 glazing points on each side.

    2. Remove failed glazing that cannot be maintain from the glass bed. Protect historic glass, ensuring not to break any additional glass.

    3. Glass beds should be primed with oil based primer BEFORE glazing. 

    4. Putty glaze glass with Aqua Glaze

    5. Fill cracks in glazing with Aqua Glaze

  6. Spot Prime

    1. Spot prime bare wood with oil based primer 

    2. Sand as needed between coats.

    3. Air, surface and material temperature must be above 35 degrees for 4 hrs after application

  7. Prime the Surface

    1. Brush the entire surface with 1-2 coats of Sherwin Williams Primer Rx Peel Bonding Primer

    2. Peel bonding primer helps even out less-than-perfect surfaces before painting, giving a smoother completed finish

    3. Air, surface and material temperature must be above 35 degrees for 4 hrs after application

  8. Caulk

    1. Gaps and fixed joints can be filled with Sherwin Williams PowerHouse or MaxFlex caulking after priming the surface

    2. Allow proper drying time before application of the finish

  9. Paint the Surface

    1. Brush the surfaces with 2 coats of Sherwin Williams Emerald, Waterbased Alkyd Urethane (different temperature requirements) or equivalent paints in a satin or semi gloss finish finish for ultimate protection. 

    2. OHR preferred sash brush: 2” angled ultra stiff sash brush

    3. Air, surface and material temperature must be above 35 degrees for 48 hrs after application

  10. Clean the surface

    1. Remove any paint from glass with a lubricated razor blade

    2. Clean glass with glass cleaner and paper towels

    3. Glass should be clean when viewed from 6 feet away

    4. Property should be clean of all construction debris and paint chips

    5. Trash can be disposed of at Old Home Rescue or construction dumpster on-site.

  11.  Notes on Painting Wood Windows

    1. The above specifications are for painting wood windows for stabilization, protection and maintenance on a cyclical basis. Window painting’s cosmetic results should be viewed from 5 feet away as there may still be inconsistencies in the paint surface. 

    2. If the Neighbor is interested in additional surface preparation or replacements parts to their window, direct them to the Old Home Rescue Project Manager, who will discuss off-site restoration or reproduction windows.

Click the image below for an up-to-date checklist!

Field Guide: Remove Vinyl or Aluminum Siding

The truth about replacement siding… well, is that it’s bad.

Underneath the shell that’s been placed on a house, is rushed work that didn’t take the long term interest of the home into account. Character defining details have been covered or literally just knocked off with a hammer so that cladding could be installed. Not only this, the way in which replacement siding is installed on an old home actually pushes water behind the siding near the roofline trim, diverts water into areas that can produce rot around windows and doors, and covers up problems on a house.

At Old Home Rescue, we don’t cover up problems. We UNCOVER them because, to us, they’re not problems. They’re just part of the work on the path to Rescuing your home.

Like many of our blog posts, here’s an insight into how our teams remove vinyl or aluminum cladding and our expectations for them.

After demo, it’s time for siding and trim repairs and painting the siding. Check out the videos below for what your home could look like underneath!

Procedure:

  1. Place drop cloths or plastic underneath the working area. As the siding comes off so will the paint chips that have collected over the decades.

  2. Remove the cladding using the gentlest means necessary. This can mean taking the time to work from top to bottom and remove screws or nails. Most often, we are restoring the original siding so it is imperative not to cause additional damage.

  3. Siding should be hauled off to recycling, when available, or disposed of in the on-site dumpster or at Old Home Rescue’s office.

  4. Pull all nails, screws and fasteners and dispose them.

  5. Clean the entire project and leave it better than was found by picking up all paint chips, disposing of all debris, and using a magnet pick up all fasteners from the ground.

  6. Communicate rot and areas of concern to Old Home Rescue’s Project Manager

  7. Cover rot, areas of concern, or exposed sheathing with house wrap and button tab nails

Expectations

  • Removal of siding in a way that does not cause further damage

  • Removal of nails or screws left in original siding or sheathing

  • Clean-up of all debris

  • House wrap of any concern areas or exposed areas

  • Run work area with magnet to pick up nails

Field Guide: Aluminum Storm Window Installation

Replace your drafty windows! That’s what homeowners have been told for decades now, but it doesn’t have to be the case. An aluminum storm window is likely the easiest solution to cut down on air infiltration around the windows of an old home that will also protect your windows and prolong their maintenance cycle.

Like many of our blog posts, here’s an insight into how our team installs Provia aluminum storm windows and our expectations.

Tools & Material

  • Measuring tape

  • Cordless Drill

  • Magnetic drive guide

  • #2 Phillips

  • Twist bit

  • Metal Snips

  • Ladder/step stool

  • Suction cups

  • Utility knife

  • Shims

Procedure:

  1. Inspect for damage the window for any damage prior to installation.

  2. Find the window number on the label.

    • We either label our windows based on how our Hover 3D image labels windows

    • OR

    • The front elevation, left most window on the first floor is labeled 101, then working around the house front, right, back, left. Second floor & landing windows are labeled starting with 200.

  3. Carefully unpackage the window and place it by the window opening. . 

  4. Always read through the manufacturer’s instructions for exact instructions on installing the specific type of window. 

  5. Picture window style storms should have the glass removed at this time.

  6. Test fit storm window to ensure an appropriate fit. Using a suction cup can make this process easier.

    • There are two types of installation; overlap application and blindstop application.

    • Our typical installation method is the blind stop application.

  7. Trim the frame, if needed, by using a utility knife and metal snips

  8. DO NOT CAULK THE OPENING

    • This a common recommendation from storm window manufacturers; however, the storm window will not be able to be removed for maintenance of the primary window.

  9. Place the storm window in the opening with a symmetric reveal with the bottom expander pushed all the way up, if present. Shims can be helpful to hold the storm window up into place.

  10. Install the top, center screw after pre-drilling a pilot hole but do not tighten.

  11. Remove the shims and push the bottom expander down so that it’s snug against the sub sill.

  12. Pre-drill and install screws that remain around the perimeter and tighten top screw. Screws should be installed straight and not at an angle, which will cause the sides to rotate.

  13. Remove the installation clips, if present, on triple track style storm windows.

  14. Re-install the glass, if installing a picture window

  15. Check for proper operation of the sash and screen and adjust, if needed.

  16. Touch up paint with manufacture provided paint.

  17. Clean glass to be free of debris, sweat, etc.

Expectations

  • Storm window is installed according to manufacturer’s specifications, aside from caulking

  • Symmetrical reveal on window

  • Installation clips are removed after installation

  • Operational window work with ease

  • Screws are not installed at an angle

  • Glass is clean and free of debris, sweat, etc.

  • Touch up paint is completed